What Size Caravan Gas Cylinders Do You Need?
To ensure that your caravan is fully equipped, it’s crucial to make informed decisions about the right supplies to pack. One of the most important choices is selecting the right gas bottle for your caravan. In this blog, we will examine what type of gas is available and the sizes you would usually need for caravanning.
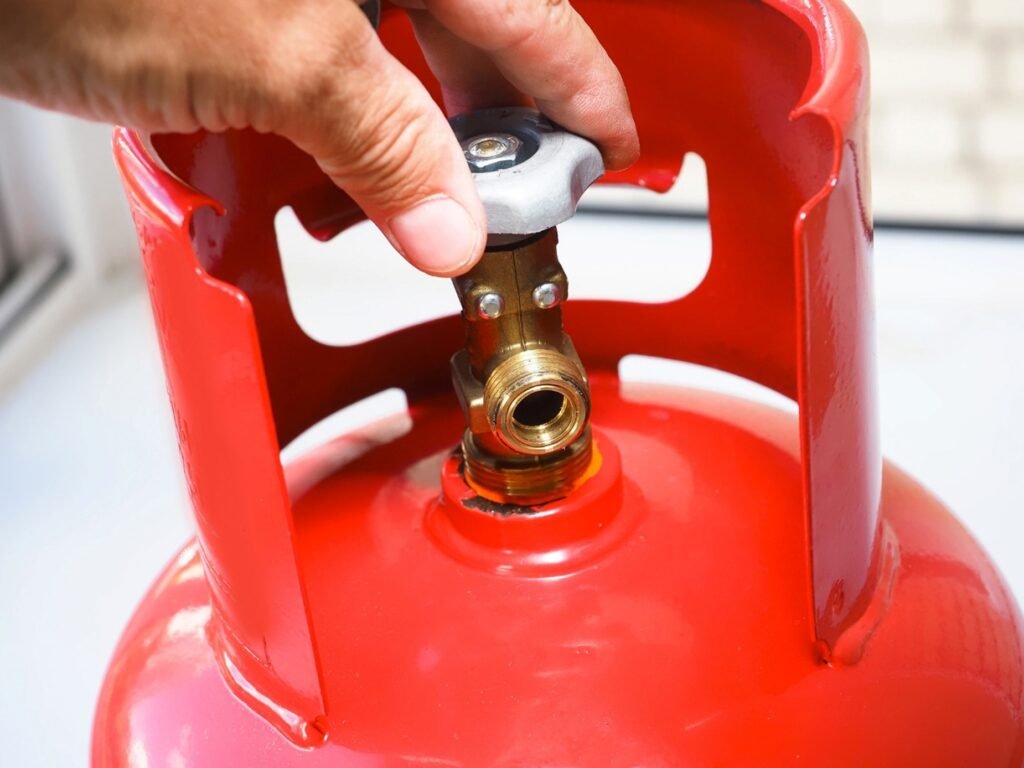
If you travel with caravans often, you must be familiar with liquefied petroleum gas (LPG), as this will make your travelling experience more comfortable. LPG gas cylinders offers a convenient and flexible way to provide cooking, heating, and refrigeration for your caravan. LPG for caravans is usually supplied in pressurised containers. To make sure that the gas reaches the appliances at appropriate pressure, you can use a pressure-reducing regulator.

Choosing the Right Gas Bottle for Your Caravan
If you’re looking to purchase a gas cylinder but are unsure which size to choose from, ask yourself what you will be using the gas bottle for. Is it for heating, cooking, or both?
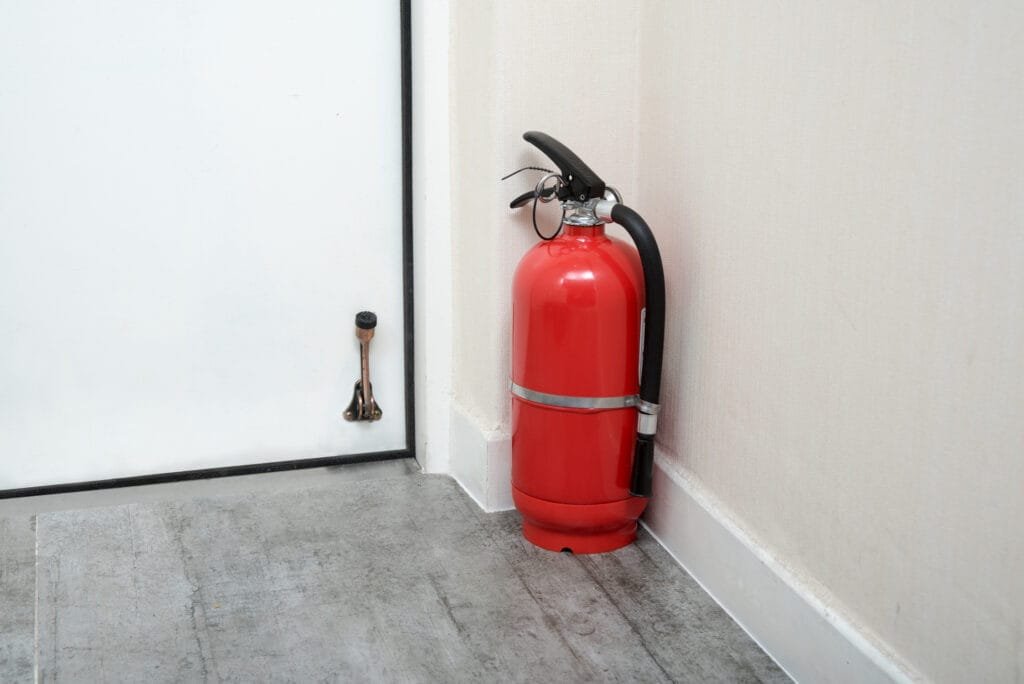
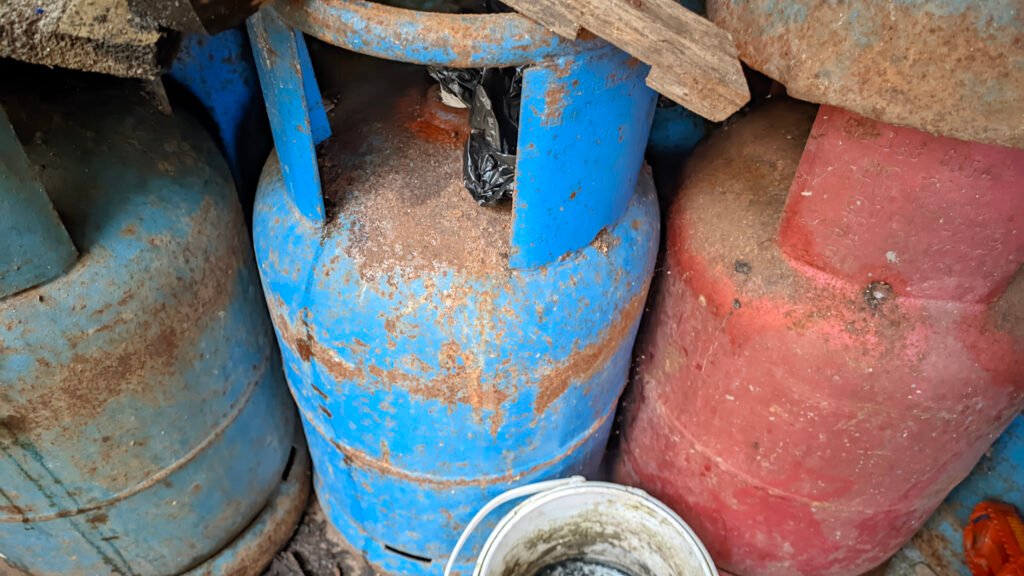
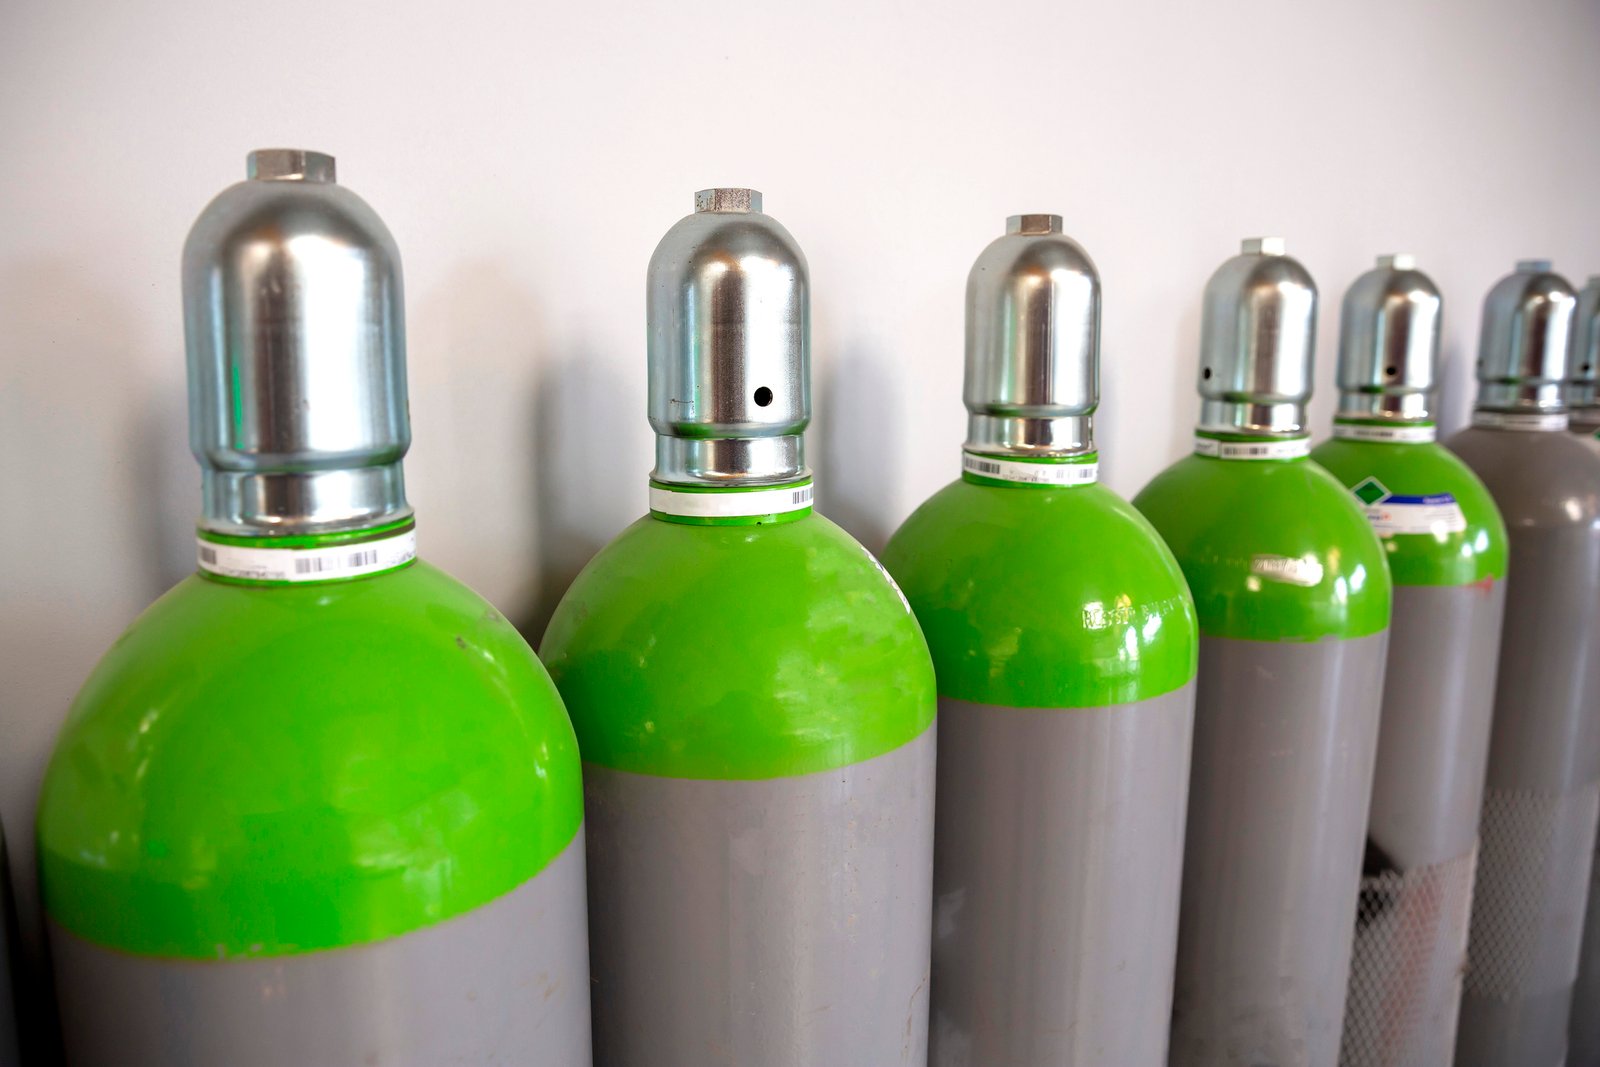
For caravan gas bottles, the most common sizes range from 6kg to 47kg. 6kg bottles are the most common and practical size for touring as most caravans have space for at least one of these. Some may stock up on a few of these bottles for longer trips, but keep in mind that this adds up in weight. If you own a static caravan, larger size cylinders like 47kg propane gas bottle are more beneficial as they require higher gas demands.
Selecting the right gas bottle for your caravan depends on the individual, your usage patterns, and the type of caravan. For touring caravans, most have agreed that a 6kg propane bottles is enough for shorter trips or a 7kg butane bottle if you are travelling in a warmer climate. If you are using the gas bottle moderately, including cooking and occasional heating, the 6kg gas cylinders will last around 1-2 weeks, ideal for shorter trips. This size offers ideal capacity and portability. However, for those travelling in a static caravan, you will need larger cylinders; this includes the 19kg propane bottles or the 47kg propane bottles. These sizes reduce the frequency of replacements and make sure you have a large amount of supply for your whole trip. If you have room for a bigger gas canister, you can still use it in your touring caravan; perfect for longer trips and frequent use of appliances.

Gas Safety on Board
Gas safety is vital for your family and yourself, these cylinders must be handled with care to avoid any serious accidents, here are some safety tips that you should consider:
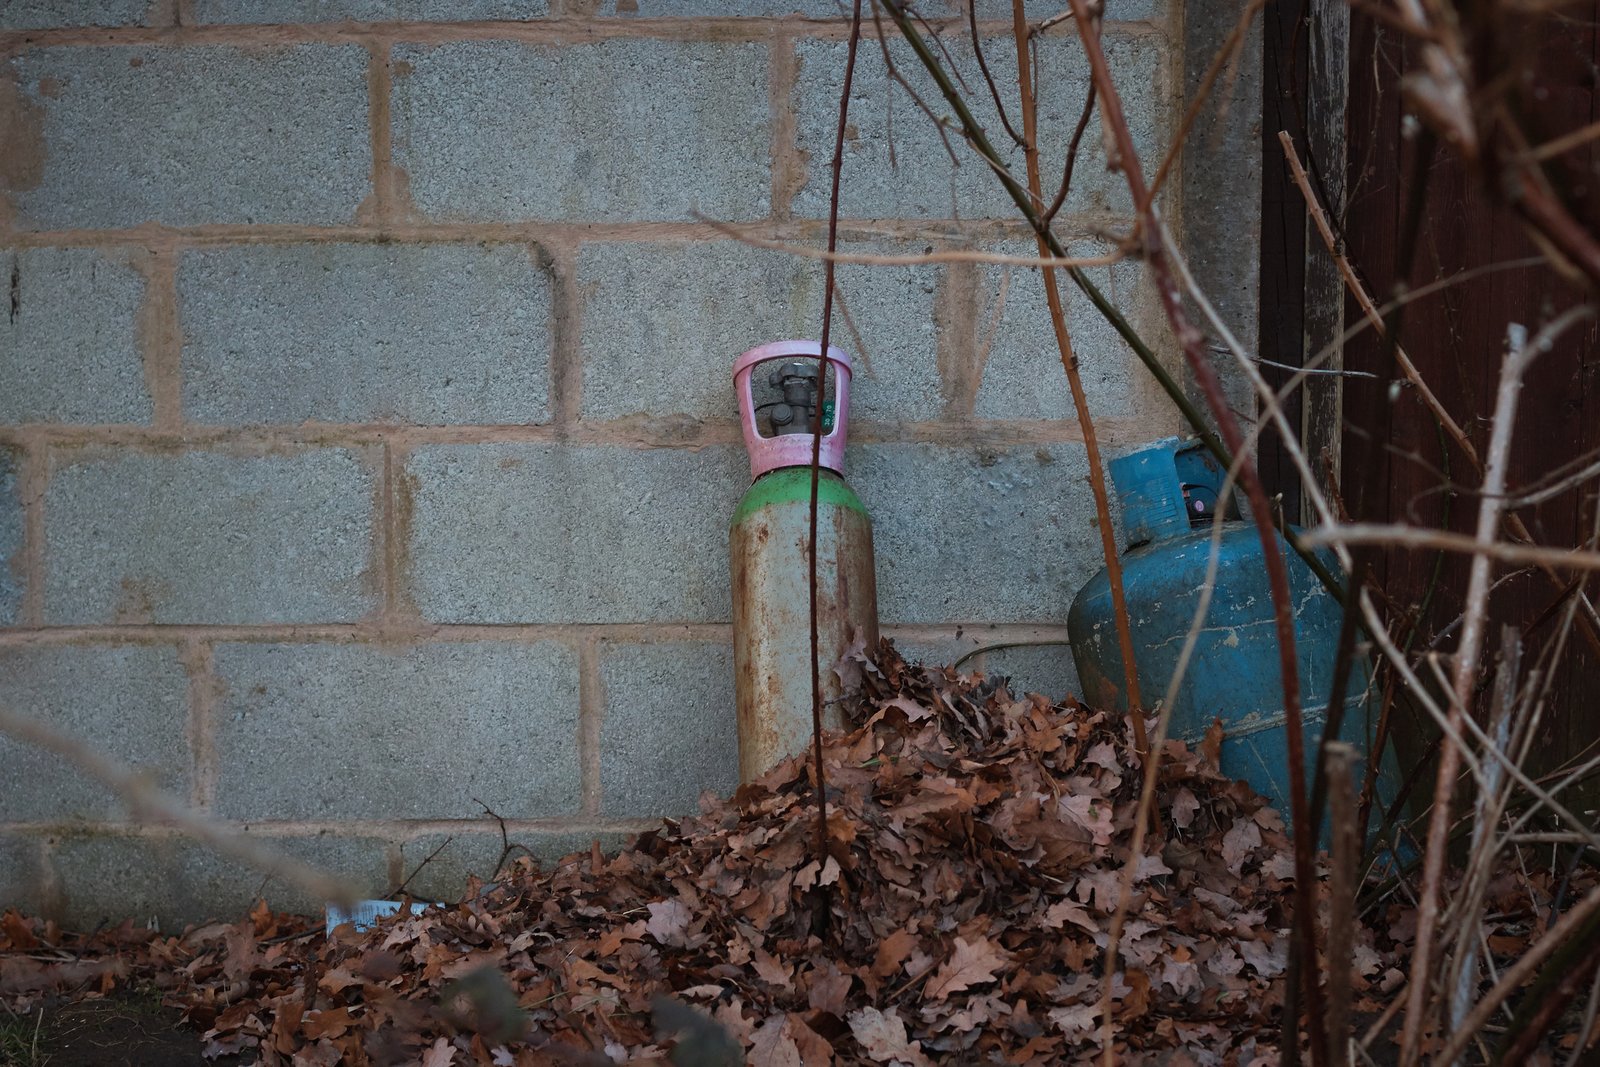
When storing an LPG bottle, make sure it is upright and stored in a well-ventilated area away from heat and other flammable material to minimise the risk of damage.
Before using, make sure to check for leaks, as they can increase the risk of explosions and fires. But you don’t need to worry, as here at Adams Gas, our trained inspectors thoroughly inspect all our cylinders and ensure that all examinations are UK and European complaint. So, all our gases must meet certain criteria before being provided to you.
Carbon monoxide poisoning is very dangerous. Because the gas is colourless and tasteless, a space can be filled with the fumes quickly without any signs. You could install a carbon monoxide detector to protect yourself from this poisonous gas.

How to estimate usage and avoid running out of gas
To estimate your gas usage and avoid running out during a caravan trip, regularly check gas levels using a level indicator or by weighing the cylinders. You could also estimate and plan the amount of gas that you’re using. When doing this, consider how long your trip is and the consumption based on your habits and what type of appliances you’re using. Remember that during colder weather conditions, gas consumption increases.
You can prevent running out of gas by carrying an extra gas cylinder in your van. Always prepare for the worst, an extra gas bottle is better than having none. In case of emergencies or sudden running out, you will always have a backup. You should also think about your route and see if there are any gas refill locations along the way in case you need gas bottle refill. To further minimise running out of gas, you can also turn off gas appliances before you travel and when not in use.
Running out of gas during a trip can be frustrating and can lead to disaster, especially when your refills are unavailable.

Choosing the type of gas canisters and size and maintaining safety are crucial for caravan trips to make sure you have an enjoyable experience without the stress. Knowing the duration of your trip, the type of gas you are using, and the size helps you avoid any interference due to your gas supply.
Browse our website to see what gases we offer, or if you need further assistance and recommendations on the perfect gas for your caravan, please contact us on 0800 195 4445 or email us via sales@adamsgas.co.uk, our team will be delighted to help you.
What Size Caravan Gas Cylinders Do You Need?
What Size Caravan Gas Cylinders Do You Need?
To ensure that your caravan is fully equipped, it’s crucial to make informed decisions about the right supplies to pack. One of the most important choices is selecting the right gas bottle for your caravan. In this blog, we will examine what type of gas is available and the sizes you would usually need for caravanning.
If you travel with caravans often, you must be familiar with liquefied petroleum gas (LPG), as this will make your travelling experience more comfortable. LPG gas cylinders offers a convenient and flexible way to provide cooking, heating, and refrigeration for your caravan. LPG for caravans is usually supplied in pressurised containers. To make sure that the gas reaches the appliances at appropriate pressure, you can use a pressure-reducing regulator.
Choosing the Right Gas Bottle for Your Caravan
If you’re looking to purchase a gas cylinder but are unsure which size to choose from, ask yourself what you will be using the gas bottle for. Is it for heating, cooking, or both?
For caravan gas bottles, the most common sizes range from 6kg to 47kg. 6kg bottles are the most common and practical size for touring as most caravans have space for at least one of these. Some may stock up on a few of these bottles for longer trips, but keep in mind that this adds up in weight. If you own a static caravan, larger size cylinders like 47kg propane gas bottle are more beneficial as they require higher gas demands.
Selecting the right gas bottle for your caravan depends on the individual, your usage patterns, and the type of caravan. For touring caravans, most have agreed that a 6kg propane bottles is enough for shorter trips or a 7kg butane bottle if you are travelling in a warmer climate. If you are using the gas bottle moderately, including cooking and occasional heating, the 6kg gas cylinders will last around 1-2 weeks, ideal for shorter trips. This size offers ideal capacity and portability. However, for those travelling in a static caravan, you will need larger cylinders; this includes the 19kg propane bottles or the 47kg propane bottles. These sizes reduce the frequency of replacements and make sure you have a large amount of supply for your whole trip. If you have room for a bigger gas canister, you can still use it in your touring caravan; perfect for longer trips and frequent use of appliances.
Gas Safety on Board
Gas safety is vital for your family and yourself, these cylinders must be handled with care to avoid any serious accidents, here are some safety tips that you should consider:
When storing an LPG bottle, make sure it is upright and stored in a well-ventilated area away from heat and other flammable material to minimise the risk of damage.
Before using, make sure to check for leaks, as they can increase the risk of explosions and fires. But you don’t need to worry, as here at Adams Gas, our trained inspectors thoroughly inspect all our cylinders and ensure that all examinations are UK and European complaint. So, all our gases must meet certain criteria before being provided to you.
Carbon monoxide poisoning is very dangerous. Because the gas is colourless and tasteless, a space can be filled with the fumes quickly without any signs. You could install a carbon monoxide detector to protect yourself from this poisonous gas.
How to estimate usage and avoid running out of gas
To estimate your gas usage and avoid running out during a caravan trip, regularly check gas levels using a level indicator or by weighing the cylinders. You could also estimate and plan the amount of gas that you’re using. When doing this, consider how long your trip is and the consumption based on your habits and what type of appliances you’re using. Remember that during colder weather conditions, gas consumption increases.
You can prevent running out of gas by carrying an extra gas cylinder in your van. Always prepare for the worst, an extra gas bottle is better than having none. In case of emergencies or sudden running out, you will always have a backup. You should also think about your route and see if there are any gas refill locations along the way in case you need gas bottle refill. To further minimise running out of gas, you can also turn off gas appliances before you travel and when not in use.
Running out of gas during a trip can be frustrating and can lead to disaster, especially when your refills are unavailable.
Choosing the type of gas canisters and size and maintaining safety are crucial for caravan trips to make sure you have an enjoyable experience without the stress. Knowing the duration of your trip, the type of gas you are using, and the size helps you avoid any interference due to your gas supply.
Browse our website to see what gases we offer, or if you need further assistance and recommendations on the perfect gas for your caravan, please contact us on 0800 195 4445 or email us via sales@adamsgas.co.uk, our team will be delighted to help you.
A Guide to Bottled Gas used on Boats
Bottle gases are used in different types of boats from canal to ferries; however, propane and butane are the two most common petroleum gases used for daily operations, essential for comfort and safety on the water. Liquified petroleum gas fuels appliances onboard, providing hot water, central heating, refrigeration, cooking and more. Both fuels have their advantages. However, propane is often the preferred choice for marine installations. Reliable gas systems are crucial for the sake of everyone’s safety. In this blog, we will investigate how the different types of gases are used in water. And how to highlight safety precautions to make sure the system operates smoothly.
The Role of Bottle Gases on Boats
On watercraft like ferries, boats and yachts, bottle gases like propane and butane are utilised to maintain comfort, as they are commonly used primarily for cooking and heating. Gas stoves and ovens make cooking at sea easier, providing energy source from bottled gas. Heating in cabin heaters are also gas-powered to make sure living spaces are in bearable temperatures, especially during the colder weather. The fridges are also gas-powered to keep food and ingredients fresh, which is crucial when on the water for a long period of time.
Gases are typically used on water vehicles to generate energy for critical uses like cooking, staying warm, and preserving food. Both butane and propane provide consistent flame control for efficient cooking. Gas-powered heaters are a must to stay warm and cosy. It would be difficult to manage daily tasks without them. These gases are known to be versatile, offering a steady and reliable energy source no matter how long you’re at sea.

Ensuring Safety When Using Gas on Boats
It is important to ensure any gas appliances on a water vessel are properly installed and maintained to guarantee safety. The way gases are handled on boats is very different from the fixed pipeline system used in buildings. Only appliances that are suitable for LPG and marine environments should be used on boats. Unsafe installations, storage and maintenance could risk leaks, fires, explosions or even carbon monoxide poisoning. Liquefied petroleum gas is known to be potentially hazardous. However, it can be used safely if gas equipment is properly installed, maintained, and inspected by the supplier for damage. At Adams Gas, safety is critically assessed, and all our gas cylinders are regularly tested and maintained to exceed industry standards. When maintaining your own gas bottles, we also offer safety and storage tips.

You must always store gas bottles in well-ventilated areas away from heat or open flames, securely fastened to prevent movement during travel. Professionals like ourselves should install the gas system to reduce the risk of gas leaks and accidents. Of course, you should regularly check your gas systems for leaks or damage and inspect connections and regulators to make sure everything is operating as it should be.
Following these safety tips, you can minimise the risks associated with using gas on your watercraft and enjoy your trip without any worries.
How to Choose the Right Gas for Your Boat
Selecting the perfect gas cylinder for your boat or yacht depends on several factors, like the size of the water vehicle and how long you’re on the water. You should consider things like the bottle size to meet demands and the duration of your trip, as you may need a larger bottle or several ones to make sure your vehicle doesn’t run out. You should always choose a gas bottle designed specifically for marine use, as they are built differently to withstand any marine challenges, offering more reliability and safety.

Emergency Gas Procedures When You’re in Water
Bottled gases can be very useful in emergencies to provide essential resources like heating during power outages. If your boat’s main heating system fails, gas heaters can act as a backup, making sure you have access to heat throughout your journey. The gas-powered stove also provides a backup cooking system if the electric system breaks down or you are in an area without access to shore-based power. Cylinders are lightweight and portable; you can store multiple ones on your water vehicles so that you always have a backup. It’s better to have too many than none at all.

The Importance of Bottle Gases in Boats
Propane and butane are essential on ferries, boats, and yachts to ensure smooth operations of essential systems. Choosing the right type of gas and maintaining safe practices will help boat owners and operators maximise the comfort, safety, and efficiency of the watercraft.
Prioritising safety and selecting the correct gas from a trusted manufacturer such as Adams Gas means you can enjoy your experience on the water without worry.
If you’re looking for a reliable gas supplier for your watercraft, we are here to assist you. At Adams Gas, we provide a large selection of gas canisters for different industries. We are also open to expanding our product range at customers’ request, so make sure to contact us today if you can’t find the gas you need or if you need more information about the products we offer.
Bottle Gases for World Tours, Stadium Performances, and Visual Effects
Did you know that bottle gases are utilised during live concerts, festivals and stadium performances? Even though the music or performance is the star of the show, it wouldn’t be completed without visual effects that have been planned behind the scenes.
To elevate the audience, experience further, organisers frequently utilise firework displays, smoke machines and confetti cannons to create a wow factor and unforgettable moments that capture the audience’s attention.
These impressive visual effects rely on bottle gases like propane and CO2, which are essential for producing the mist, lights and colours that make live events so breathtaking.

The Role of Bottle Gases in Pyrotechnics and Visual Effects
Bottle gases are important for creating an exciting and special touch to live entertainment, such as concerts, stadium performances, and more. Propane and CO2 are the most commonly used gases for fireworks and other visual effects.
Propane is often used in pyrotechnics for fireworks and flame effects. People rely on propane for its portability, efficiency and environmental benefits. Concerts and festivals also rely on propane due to its efficient fuel that produces large, dramatic bursts of fire and heat. The explosions and flashes of light created by propane-powered pyrotechnics create a sense of excitement, resulting in a more engaging experience for the audience.
However, that’s not the only gas used in the entertainment industry. Carbon dioxide also plays a major role in other visual effects. It is commonly used in smoke machines to create fog or haze that enhances lighting effects. It is also key in confetti cannons, as it creates the force needed to launch streams of confetti into the air, filling the venue with vibrant colours and excitement.
Both propane and CO2 are used to elevate events, and they are carefully controlled to ensure that they are safe and effective for events like this. Event organisers work alongside gas suppliers to ensure that the right type and amount of gas cylinders are available and used correctly to achieve the desired effect.

How Gases Power Large-Scale Events
Using bottle gases in the entertainment industry is more challenging than you may think. It is crucial to deal with gases as safely as possible, from delivery to installation to disposal. Ensuring that the bottle gases are safely delivered to large-scale events like world tours and stadium performances is vital.
At Adams Gas, we don’t just provide the products. We offer bottle gas refills, collection, and re-delivery to ensure that the bottles of gases are delivered to the events on time and in perfect condition, allowing smooth operation without complications. We go the extra mile to make sure our customers are satisfied with our services, which is why we offer the delivery of gas cylinders to customers at affordable prices.
Even though bottled gases are essential to create beautiful visual effects, there is a growing focus on sustainability within the entertainment industry. Live events and tours have a significant environmental footprint. A range of different celebrities and event organisers are looking for ways to reduce the environmental impact of gas-powered effects.
In 2021, Coldplay announced a 12-point plan to cut the carbon footprint of touring by 50% with some creative solutions. After setting this target, the band announced a total of 59% reduction in carbon dioxide emissions compared to their previous world tour. Solar panels, kinetic flooring, and exercise bikes help power the venue.
On the other hand, artists like Taylor Swift have received attention due to her large environmental impact. Her frequent private jet flights caused a study from a UK marketing agency to claim she was the number one celebrity CO2 polluter in 2022. The industry as a whole is becoming more mindful of these concerns, and they need individuals to take action to make a difference.
Because sustainability is becoming more recognised in the media and entertainment industries, the exploration of more eco-friendly visual effects alternatives, such as low-emission gases or advanced technologies that minimise environmental impact, is increasing.

Gas cylinders like propane and CO2 are the most popular gases behind eye-catching visual effects in the entertainment industry. Whether you’re looking to fill the air with smoke or confetti or light up the venue with fiery smoke and fireworks, these gases are essential to creating an extraordinary experience at live concerts, world tours, and stadium performances.
Event organisers and tour managers should partner with reliable suppliers who provide high-quality gases and ensure safe and efficient delivery. At Adams Gas, we supply the bottle gases needed for these large-scale events and are committed to providing the best service to help make any event a success.
As the entertainment industry continues to evolve, so does the need for sustainable yet stunning visual solutions. Technologies are helping to make the future of live events more eco-friendly. However, right now, propane and CO2 remain the main components of producing spectacular visual experiences.
If you or anyone you know is planning a live event and requires reliable bottle gases for a range of visual effects, make sure to explore Adams Gas’s product offerings and services. If you have any questions or would like to receive an expert’s opinion, contact us via our website.
Bottle Gases Used in Food Stalls and Mobile Catering
Food stalls and mobile catering units are all the rage right now. Whether in London’s trendy food markets or at the fairground, these are great ways for businesses to serve delicious eats at different locations. Many food stalls utilise bottle gases in their operation, providing a reliable and portable energy source that works for a variety of food outlets.
In this blog, we’ll be covering how gases are used in food stalls, including the benefits they offer and the types of stalls they work with. Gas safety is vital within these environments, so we’ll also discuss some safety tips and regulations surrounding food stalls.

How Gases are Used in Food Stalls
Food stalls are typically set up for short-term events or are travelling from location to location. This means that they require a reliable and portable energy source that can work well in a variety of environments.
Bottle gases are a flexible alternative to fixed gas lines. Instead of extensive implementation, bottle gases can be swapped out and delivered when needed. This is perfect for events like fairs and food festivals, where setting up and packing down need to be quick and easy.
Having a portable cooking source doesn’t equate to compromising on quality, as bottle gases provide a reliable and consistent source of heat for cooking equipment, like grills, fryers, stoves, and ovens.
Propane: Propane gas bottles are some of the most common gas bottles found within mobile food units. This gas is able to reach a high heat output, which ensures that food is being cooked quickly and safely. Propane burns well even in lower temperatures, so it works well for food stalls that are frequently exposed to colder weather. Propane burns with minimal soot, so it’s perfect for cooking food as it doesn’t leave residue or create unpleasant smells.
Butane: Butane gas bottles are also utilised in cooking, adapted to smaller food stalls, and are also found in portable cookers and BBQs. Butane operates with a lower energy content and pressure, so it has a more manageable heat level.

Appliances that Use Gas Bottles in Food Stalls
There are many kinds of appliances that utilise bottle gases due to their energy power and versatility. Here are just a few examples:
- Grills: Kebab, shish, and doner stalls utilise gas-powered kebab grills to cook meats and vegetables. These grills typically include a hermetically sealed base that stops fat from running into the motor and multiple heat zones for even cooking.
- Cast-Iron Griddle: Many businesses benefit from the features a cast-iron griddle provides. They’re capable of reaching high temperatures of up to 300°C, which is ideal for searing steaks, burgers, and breakfast items like eggs. The hot heat provided by bottle gases allows food to remain hot without burning it.
- Fryer: Fryers are a popular choice amongst food vendors to serve up some fried goodness like chips, fried chicken, and battered fish. Compact gas bottles are capable of powering these fryers, whether just as a single unit or as multiple units.

Gas Safety in Food Stalls
If you’re considering introducing a gas bottle into your mobile food stall, then you need to be aware of the potential risks and hazards that are associated with them. Neglecting proper maintenance and gas safety procedures can lead to disastrous consequences, and you could be facing criminal charges if you have not followed the correct procedure. Be sure to follow these gas safety tips when using bottle gases within your food stall:
- Proper Storage: Store gas bottles in a cool, dry, well-ventilated area away from direct sunlight and heat sources. Ensure that bottles are upright and secure so that they don’t fall over.
- Check for Leaks: Any staff working on the food stall should be aware of how to detect a gas leak before using the bottles. Signs of a gas leak can include the smell of gas, yellow or orange flames instead of blue flames, and increased condensation on windows.
- Be Aware of Emergency Procedures: In the event of a fire caused by a gas leak, make sure to raise the alarm immediately, call any emergency services and shut the valves on all bottles.
- Ventilation: Make sure your food stall is adequately ventilated, as this will help prevent the build-up of harmful gases like carbon monoxide.
- Conduct Regular Maintenance: Even if you don’t suspect any issues, conduct regular checks on your equipment for any sizes of wear and tear.
- Follow Regulation: There is extensive regulation in place when it comes to gas safety, and it’s important that your food stall adheres to these guidelines. Check the requirements for acts such as the Gas Appliances Act 1995, The Gas Safety Regulations 1998, and Gas Safety in Catering and Hospitality 2013, in addition to any other applicable.

Gas bottles hold an abundance of uses in food stalls, from fryers to grills, they can provide a portable yet reliable replacement for complex gas lines. It is imperative to perform regular maintenance and safety checks on bottle gas equipment in order to ensure that guidelines are being followed, and that there are no hidden hazards. We are trusted bottled gas suppliers, offering a range of gas products to meet your business needs. Please feel free to contact us with any questions.
Gas Bottles for Campervans, Caravans and Motorhomes
Gas bottles are a vital part of life on the road for campervan, motorhome and caravan fans. They power essential appliances like cookers, heaters and refrigerators, meaning you can enjoy the comforts of home even while off-grid.

Whether you’re a weekend camper or a full-time traveller, understanding the role of gas bottles in your setup is key to making the most of your adventures.
Why Gas Bottles are Essential for Campervans and Motorhomes
Gas bottles provide a portable and reliable energy source for mobile homes. They are particularly useful for cooking, heating and running a fridge or freezer, even if you’re off-grid and enjoying a night under the stars.

One of the main appeals of campervans and motorhomes is the freedom to travel without relying on traditional campsites. Gas bottles enable true off-grid travel by providing energy for essential functions. This independence is perfect for exploring remote locations, enjoying nature, or simply avoiding overcrowded areas.
For campervans and motorhomes, propane is a popular choice due to its performance in colder climates. Explore our range of propane gas bottles designed for motorhomes and campervans, and prepare for your next adventure.
Static Caravans vs Mobile Homes: What’s the Difference?

While gas bottles are indispensable for mobile homes, static caravans have slightly different needs. Static caravans often connect to larger, refillable gas cylinders that provide a steady supply for extended stays. In contrast, campervans and motorhomes rely on compact and portable bottles of suitable mobile home gas for flexibility and convenience. Caravan gas bottles are essential if you’re in a static caravan.
Safety Tips for Using Gas Bottles
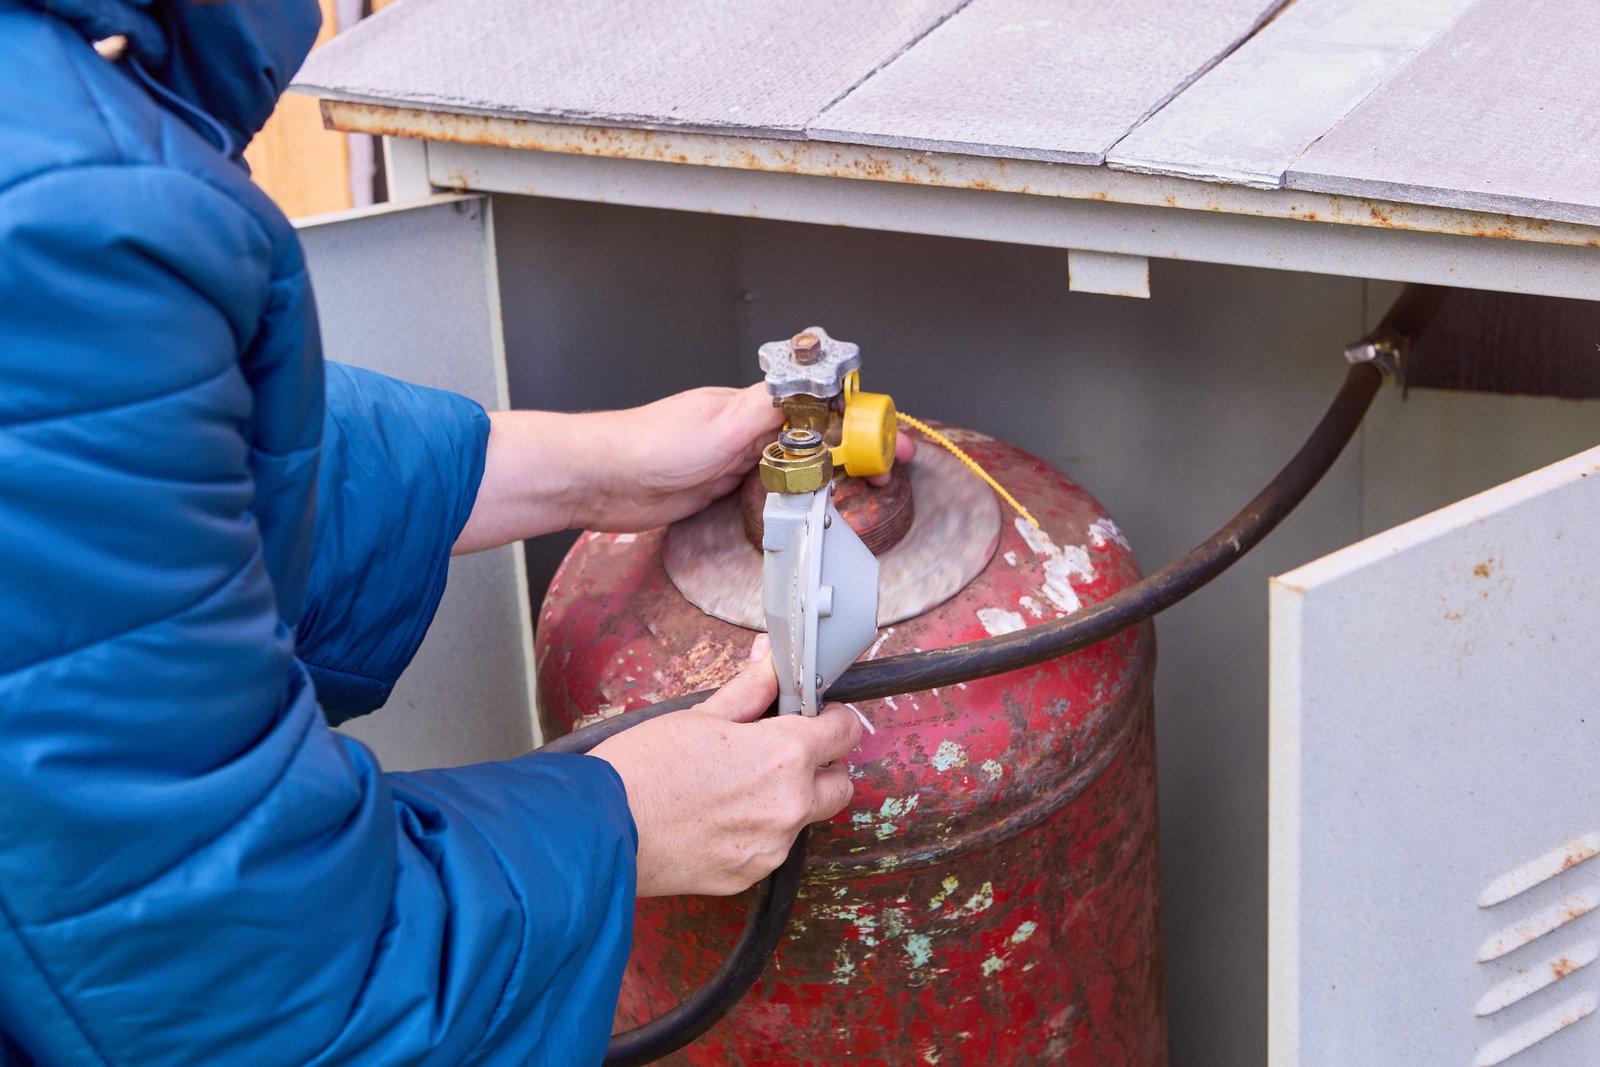
Safety is paramount when using gas bottles. Inspect your gas bottles and connections frequently to ensure there are no signs of damage, corrosion or leaks. A simple way to check is by using soapy water: apply it to the connections and look for bubbles, which indicate escaping gas. If you detect a leak, turn off the supply immediately and seek professional assistance.

Always keep your gas bottles in an upright position to prevent liquid gas from escaping. Storing them in a well-ventilated area reduces the risk of gas accumulation, which could lead to fire or explosion. Avoid keeping bottles in confined spaces, near open flames or in direct sunlight, as excessive heat can cause pressure to build.
When the gas isn’t in use, ensure the supply is completely turned off at the cylinder. This is especially important when driving, as movement can cause connections to loosen or gas to leak. If you’re using a gas appliance in a caravan or motorhome, ensure it’s designed for safe operation while in transit.
Ready to Hit the Road?
Gas bottles are the backbone of comfortable and flexible travel in campervans, motorhomes, and caravans. From cooking to heating, they provide everything you need for an unforgettable off-grid adventure. Contact us to learn more about picking up the perfect gas bottle for your off grid travel or static home.
Liquid CO2 for Pipe Freezing – The Ultimate Solution for Maintenance and Repairs
Liquid CO2 for Pipe Freezing: The Ultimate Solution for Maintenance and Repairs
Why Liquid CO2 is the Best Choice for Pipe Freezing?
Liquid CO2 is a highly effective and cost-efficient method for pipe freezing, making it ideal for repairs and modifications. This technique allows engineers to isolate sections of pipe without draining entire systems, significantly reducing downtime and costs. Additionally, liquid CO2 has several advantages over traditional pipe freezing methods. Firstly, its low temperature (around -78.5°C or -109.3°F) allows for rapid formation of an ice plug, which can effectively seal off the pipe. This rapid freezing process minimizes the time required for work, enabling technicians to complete repairs swiftly and return systems to operation with minimal disruption.
Another significant benefit of using liquid CO2 is its ability to freeze pipes of various sizes and materials, including metals and plastics. This versatility makes it suitable for a wide range of applications, from residential plumbing to industrial processes. Furthermore, the non-toxic nature of CO2 ensures that it is safe for use in environments where human contact or food safety is a concern.
Liquid CO2 also provides a clean and efficient solution. Unlike traditional methods that may involve the use of salts or other chemicals, liquid CO2 does not leave any residue behind after the freezing process. This characteristic helps maintain the integrity of the pipe and the surrounding environment, ensuring that no additional clean-up or treatment is necessary once the work is complete.
Moreover, the logistics of transporting and handling liquid CO2 have become increasingly streamlined. With the availability of portable CO2 tanks and the development of specialized equipment for pipe freezing, the setup and execution of this method have become more accessible and user-friendly. This ease of use contributes to the growing popularity of liquid CO2 in the industry.
In conclusion, liquid CO2 stands out as the best choice for pipe freezing due to its efficiency, effectiveness, safety, and versatility. By allowing for quick isolation of pipes without the need for extensive draining or downtime, liquid CO2 not only saves time and money but also enhances the overall reliability of plumbing and industrial systems. As technology continues to advance, the adoption of liquid CO2 for pipe freezing is likely to increase, further solidifying its position as a preferred solution in maintenance and repair operations.
Table of Contents
- How Does Liquid CO2 Pipe Freezing Work?
- Why Choose CO2 for Pipe Freezing?
- Key Benefits of CO2 Pipe Freezing
- Common Applications of Pipe Freezing
- Step-by-Step Guide to Pipe Freezing with Liquid CO2
- Essential Pipe Freezing Equipment
- Is CO2 Pipe Freezing Safe?
- How Long Does Pipe Freezing Take?
- Pipe Freezing vs. Other Isolation Methods
- Where to Buy CO2 for Pipe Freezing?
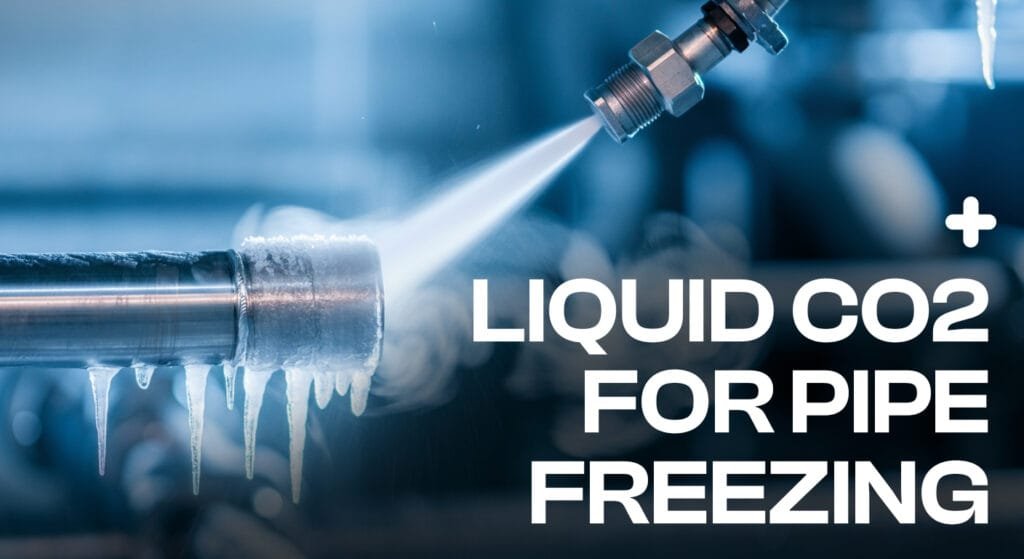
How Does Liquid CO2 Pipe Freezing Work?
Liquid CO2 is injected into a specially designed jacket that is wrapped around the pipe. As the CO2 expands, it immediately expands to form dry ice, which rapidly lowers the pipe’s temperature to -78°C. This results in a solid ice plug inside the pipe, effectively sealing off the section of pipe covered by the jacket.
Why Choose CO2 for Pipe Freezing?
- No Need to Drain Systems: Saves time and prevents water waste.
- Minimal Equipment Required: Only a cylinder of liquid CO2 and a freezing kit are needed.
- Effective on Various Pipe Materials: Works on iron, copper, lead, steel, and plastic pipes.
- Safe and Reliable: The resulting rise in pressure is very small, reducing risks.
Key Benefits of CO2 Pipe Freezing
- Rapid Freezing: The low temperature quickly freezes the water inside.
- Cost-Effective: No need to drain and refill large systems.
- Eco-Friendly: Reduces water waste.
- Safe Process: Damage to the pipe is minimal when done correctly.
Common Applications of Pipe Freezing
- Valve Replacement
A frozen in-line ice plug allows for the safe removal of defective valves without shutting down an entire system. - System Modifications
Pipe freezing temporarily isolates the water in the system, allowing engineers to make modifications to pipelines without disruption. - Emergency Repairs
For sudden pipe leaks, pipe freezing provides a quick and effective isolation solution.
Step-by-Step Guide to Pipe Freezing with Liquid CO2
- Preparation: Ensure the pipe is clean and free of flowing water.
- Apply the Jacket: Wrap the specially designed jacket around the pipe at the freeze point.
- Inject the CO2: Connect the jacket to a CO2 cylinder using a high-pressure hose.
- Freezing Process: Liquid CO2 is injected into the jacket, where it expands to form a solid ice plug.
- Perform Repairs or Modifications: Once the secure ice plug forms, proceed with maintenance.
- Thaw the Ice Plug Naturally: After the repair, allow the ice plug to melt, restoring normal flow.
Essential Pipe Freezing Equipment
- Qwik-Freezer™ Pipe Freezing Kit – A kit is easy to use and allows for effective pipe freezing.
- CO2 Cylinder – A cylinder of liquid CO2 by means of a high-pressure hose supplies the freezing agent.
- Specially Designed Jacket – The jacket is wrapped around the pipe at the freezing point.
Is CO2 Pipe Freezing Safe?
Yes, when done correctly! However, safety precautions must be followed:
- Always wear insulated gloves and safety glasses when handling CO2.
- Ensure proper ventilation to prevent CO2 buildup.
- Follow all safety data sheets from Adams Gas Safety & Storage
How Long Does Pipe Freezing Take?
- Depends on Pipe Diameter: Larger pipes take longer to freeze.
- Water Temperature Matters: Pipes containing warmer water take longer to freeze.
- General Estimate: A 1-inch pipe freezes in about 5 minutes, while a 4-inch pipe can take up to 40 minutes.
Pipe Freezing vs. Other Isolation Methods
| Method | Pros | Cons |
|---|---|---|
| Pipe Freezing | Quick, cost-effective, minimal downtime | Requires CO2 and proper setup |
| Draining & Refilling | No extra equipment needed | Time-consuming, wasteful |
| Mechanical Pipe Stops | Reusable, reliable | Expensive, requires system shutdown |
Where to Buy CO2 for Pipe Freezing?
For high-quality CO2 cylinders, visit Adams Gas:
- Rent-Free Gas Cylinders
- Nationwide Delivery
- Expert Advice on Gas Usage
Summary: Why Liquid CO2 is the Best for Pipe Freezing
- ✅ No need to drain systems
- ✅ Forms a secure in-line ice plug
- ✅ Works on various pipe materials
- ✅ Safe and cost-effective
- ✅ Reduces downtime and water waste
For reliable pipe freezing solutions, get your CO2 cylinders from Adams Gas
What Are Gas Fittings Used For?
Gas fittings play an essential role in lots of different applications, ensuring the safe and efficient transport of gas for everything from camping stoves to industrial machinery.
Understanding the types of fittings available and their specific uses can help you choose the right one for your needs and keep things safe. In this guide, we’ll explore the different types of gas fittings and highlight how they’re used.
What are gas fittings?
Gas fittings are components that connect gas lines, cylinders or appliances to ensure a secure and leak-free flow of gas. These fittings include regulators, valves, connectors and adapters. They are designed to handle different types of gas, such as propane, butane or natural gas, and cater to varying pressure requirements.
You can find a variety of different types of gas fittings in our kits, such as our Oxygen Propane Propylene HD Gas Heating Kit. This contains regulators, gas connectors and valves, as well as arrestors, hose and nozzles.
Types of gas fittings
To understand gas fittings in a bit more detail, let’s take a look at the different types of gas fittings applications. Understanding how they’re used can help you to recognise when you need to replace certain components.
1. Gas regulators
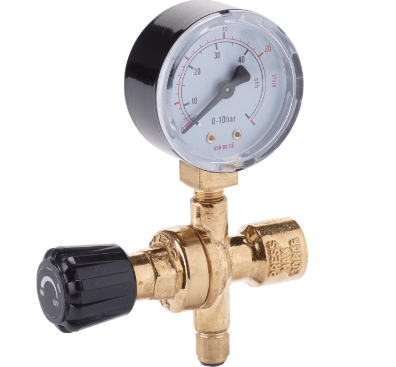
Regulators, like the Clip On Butane Regulator with Pressure Gauge, control the pressure of gas flowing from a cylinder to an appliance. They ensure that the gas pressure remains consistent and safe for use. For example, low pressure regulators are used for barbeques and patio heaters, whereas high pressure regulators are more commonly used in industrial burners and heavy-duty equipment.
2. Valves
Valves are critical for controlling the flow of gas, allowing users to turn the gas supply on or off. Ball valves are used for quick shutoff in emergency situations, and needle valves for precise control in laboratory or medical equipment.
3. Gas connectors
Gas connectors link gas cylinders to appliances, ensuring a secure and flexible connection. They come in a variety of different materials, such as rubber or stainless steel, to suit different environments.
4. Adapters
Adapters enable compatibility between different gas fittings or appliances. For instance, an adapter might allow a propane fitting such as a regulator to connect to butane fittings – but it’s important that you know what you’re doing.
Applications of gas fittings
Gas fittings are used for a variety of different things. They’re used in camping and outdoor cooking to make things more comfortable. Regulators and connectors are vital for setting up portable stoves or BBQs, ensuring a steady and safe gas supply.

In homes, gas fittings connect heaters and boilers to their gas supply, maintaining efficient performance. Portable heaters often use regulators to ensure the correct gas pressure.
Industries rely on high-pressure regulators and durable connectors for equipment like blowtorches, kilns and furnaces too. Safety valves also play a crucial role in preventing accidents in high-stakes environments. Gas fittings are integral to backup power systems that run on gas generators. Reliable connectors and regulators ensure that these systems perform seamlessly during outages.
Choosing the right gas fitting
Selecting the right gas fitting is important for safety, efficiency and performance. One of the primary considerations is the type of gas you’ll be using. Different fittings are designed to work with specific gases, such as propane, butane or natural gas, and making sure fittings are compatible is essential – carefully check the manufacturer’s specifications to confirm the fitting is suitable for the gas type.
Pressure requirements are another critical factor. Gas appliances operate at specific pressures, and your fittings must match these requirements to ensure proper operation. For instance, a regulator or valve not designed for your appliance’s pressure needs can result in underperformance or even dangerous overpressure. When selecting your fitting, verify the pressure rating and make sure it aligns with your appliance to maintain functionality and safety.
Consider the environment in which the fitting will be used too. Materials and coatings play a role in durability, especially in challenging conditions. For outdoor setups, choose weather-resistant materials like stainless steel or brass, which can withstand exposure to moisture and temperature fluctuations. For indoor or industrial use, assess the environmental factors such as humidity, temperature extremes, or exposure to chemicals, and choose fittings designed to handle these conditions.
Prioritising the right material for your setting not only ensures longevity but also minimises maintenance needs over time.
Safety tips for using gas fittings
Using gas fittings safely is essential to prevent accidents, leaks and other hazards. Here are some important safety tips to follow:
• Choose the right fitting – always ensure the gas fitting is compatible with the type of gas and meets the pressure requirements of your appliance. Using the wrong fitting can lead to leaks or malfunctions.
• Inspect for damage – regularly check gas fittings for cracks, corrosion or wear. Damaged fittings should be replaced immediately to prevent leaks or failures.
• Install correctly – ensure all fittings are securely tightened but avoid over-tightening, as this can damage the connection. Use the right tools and follow manufacturer instructions for installation.
• Use thread sealant – if needed, apply gas-safe thread sealant or tape to threaded connections to ensure a secure, leak-proof seal. Always use products specifically designed for gas fittings.
• Test for leaks – after installation, test for leaks using soapy water applied to the connections. Look for bubbles, which indicate a leak, and address any issues before use.
• Ensure proper ventilation – gas appliances and fittings should be used in well-ventilated areas to prevent gas build-up, which could lead to fire or explosion hazards.
• Avoid sparks and flames – keep open flames, cigarettes and sparks away from gas fittings during installation, maintenance, or repairs to prevent accidental ignition.
• Turn off the gas supply – always shut off the gas supply before working on fittings or appliances to reduce the risk of leaks or accidents.
• Perform regular maintenance – schedule inspections by a qualified technician to keep your gas fittings and appliances in safe working condition.
Essential Helium Tips for Wedding Planners
Creating stunning balloon displays with helium can transform any wedding venue, whether indoors or outdoors, into a magical and unforgettable space. You can use them to create balloon archways, gifts for younger guests at your event, photo props or as a beautiful party backdrop.

However, using helium safely requires careful planning and making sure you comply with safety rules and regulations. Here’s our guide to using helium for wedding planners.
What are the risks of using helium at your event?
Helium can pose risks when mishandled at a wedding venue. One major concern is storage and transportation of helium tanks. These tanks are highly pressurised and, if damaged or dropped, can cause injuries or damage to the venue.
In confined spaces, a helium leak could also displace oxygen, creating a suffocation hazard, particularly in poorly ventilated areas. Helium inhalation, while often seen as a party trick, is dangerous and can lead to dizziness, fainting or worse in severe cases. Wedding planners should be vigilant about these risks to ensure the safety of everyone involved.
Helium balloon safety tips

Looking for helium balloon safety tips and guidance on storing helium cylinders safely? Here’s everything you need to know about using helium safely at your next wedding or event – remember to always check and follow manufacturer’s instructions.
Storing helium cylinders safely
Proper storage of helium cylinders is essential. Always store helium canisters upright in a well-ventilated area, away from direct sunlight and heat sources. If the venue is outdoors, make sure the cylinders are sheltered from rain and wind by using sturdy covers or dedicated storage units.
When working with helium for wedding planners, always transport and handle the cylinders with care. Use cylinder trolleys to move them, and never leave them unsecured, as they can tip over easily. Remember, helium is a pressurised gas, so you need to keep the canisters in a stable and safe location.
Inflating balloons safely
Inflating balloons might seem simple, but doing it incorrectly can lead to accidents. Always use a regulator or nozzle designed for helium canisters to control the flow of gas and prevent overinflation.
Inflate balloons in a well-ventilated area to prevent helium build-up in enclosed spaces. For latex balloons, ensure they are inflated to the correct size; overinflation increases the risk of bursting.
If you’re creating balloon arrangements like arches or clusters, it’s best to prepare them on-site to avoid the hassle of transporting inflated balloons, which can risk damage to your designs. To achieve this, ensure you have the right amount of helium for party balloons.

For example, a large disposable helium bottle from Adams Gas can inflate up to 40 balloons, while a medium bottle can be used for around 25 balloons or a small bottle can be used for 10 and may be better suited for compact clusters or smaller setups.
A large balloon arch typically uses around 150-200 balloons, depending on its size and density, so you will need several large helium bottles or a 9.4l refillable helium cylinder. Preparing on-site not only saves space during transport but also ensures your balloons are perfectly inflated and arranged for the event.
Planning for outdoor events
Wondering how to use helium outdoors? When working outdoors, understanding how to use helium outdoors is crucial. Weather conditions like wind, rain and heat can affect helium balloons. Heat causes helium to expand, which can lead to balloon bursts whereas cold weather can reduce the lift of helium balloons.
To keep balloons secure in outdoor venues:
- Use weights to anchor balloons and prevent them from flying away.
- Choose high-quality balloons designed for outdoor use, such as thicker latex or durable foil.
- Avoid inflating balloons too early before the event to maintain their buoyancy and appearance.
Ensuring compliance with safety requirements

Each venue will have its own safety regulations, so wedding planners must be prepared to meet these requirements. This might include demonstrating proper helium cylinder storage, providing weights for balloons, and following local environmental guidelines, such as avoiding the release of balloons into the atmosphere.
By staying informed and adhering to these rules, wedding planners can ensure the event runs smoothly and safely, enhancing their professional reputation. Make sure to confirm with the venue whether helium and balloon arrangements are permitted in the space.
Choosing a reputable helium supplier
Choosing the right helium supplier is essential to make sure your helium decorations are safe and look great for longer. A reputable supplier will provide certified, properly maintained helium tanks and clear instructions for their safe use, reducing the risk of leaks or accidents.

Partnering with the right supplier means you have peace of mind that your vision will be delivered on the day. Adams Gas is committed to providing top-quality helium canisters to meet the needs of wedding planners and event professionals, whatever the venue. We care about reliability and safety while helping you to create incredible events.
Using Gas Cylinders Safely in Hotels
Gas cylinders are an important part of running a hotel, from fuelling kitchens to supplying beer cellar gas for bars and providing helium for events. However, improper handling and storage can lead to serious safety risks.

For hotel teams, restaurant owners, bar managers and kitchen staff, understanding best practices for gas cylinder safety is essential for ensuring smooth operations and protecting both customers and employees.
How are gas cylinders used in hotels?
Gas cylinders are used all over hotels, especially in high-demand environments like the kitchens. They’re used to power kitchen equipment like stoves, ovens and grills for a controllable and consistent heat. If there’s an outdoor cooking space, al fresco dining area or barbecue event, gas cylinders might be used too.
In bars and cellars, gas cylinders containing carbon dioxide or nitrogen are used to carbonate and dispense drinks like beer, cider and soft drinks. This ensures drinks are served fresh, with the right level of fizz for guests to enjoy. They’re also used for event decor, such as inflating balloons at weddings or parties, which might mean storing helium canisters on site.

Some hotels use gas cylinders as a backup or primary fuel source for heating systems, lighting and hot water supply, particularly in areas where piped gas is unavailable. This is especially important for maintaining guest comfort in colder climates.
Importance of gas safety
Given their wide usage, proper handling and storage of gas cylinders is important to prevent accidents and comply with safety regulations. Regular maintenance and staff training are essential to create a safe environment for both employees and guests.
Safe gas cylinder storage in kitchens
The kitchen is the heart of many hotel restaurants, but it’s also a high-risk area when it comes to gas safety. Proper placement and ventilation of gas cylinders is essential to reduce hazards.
When it comes to storage, you need to think carefully about where your gas cylinders are kept. Wondering what will happen if a cylinder is kept above a gas stove? Heat exposure can cause pressure to build inside the cylinder, increasing the risk of an explosion. To prevent accidents, always store LPG cylinders in a cool, well-ventilated area away from open flames or heat sources.

Similarly, you might wonder, is it okay to have an LPG cylinder a floor above the stove? While this setup is not uncommon, it needs planning and a risk assessment. Make sure the cylinder is stored in a ventilated enclosure and that gas lines leading to the stove are inspected regularly for leaks. Compliance with local safety regulations is crucial when implementing this type of arrangement.
Best practices for beer cellar gas
For hotels with bars, managing beer cellar gas is another key responsibility. Gas cylinders used for dispensing beer, such as CO₂ or mixed gases, must be stored securely in a cool, dry place with good ventilation.
Here are some tips for safely handling beer cellar gas:
- Regularly inspect connections and hoses to prevent leaks.
- Use secure brackets or chains to prevent cylinders from tipping over.
- Train staff on how to shut off gas supplies in case of emergency.
Using helium for hotel events

Hotels often host events like weddings, conferences and parties, where helium-filled balloons are popular for decor. When working with helium, safety precautions are just as important as in the kitchen or bar.
Here are some helium safety tips to take note of:
- Store helium cylinders upright in a well-ventilated area, away from heat sources and heavy traffic.
- Use appropriate regulators to inflate balloons and never attempt to modify or repair a cylinder yourself.
- Avoid storing helium canisters in confined spaces, as helium can displace oxygen and pose risks in case of a leak.
General gas safety tips for hotels
Whether you’re managing an LPG supply for your kitchen, beer cellar gas for your bar, or helium for events, you need to make sure that you’re regularly inspecting all gas cylinders, connections and pipeline for wear and tear. Any damaged components should be flagged and a specialist should be booked to repair them. Staff training is key here.
The same goes for being prepared in an emergency. Train your staff to recognise the signs of a gas leak, such as a hissing sound or unusual smells, and ensure they know how to respond.
Proper labelling and ventilation are important too. Ensure cylinders are clearly labelled to avoid confusion and store them according to their specific requirements. Always prioritise proper ventilation in areas where gas cylinders are stored or used to prevent gas build-up.
You should also buy your gas supplies for a reputable, professional and dependable gas supplier. At Adams Gas, we’re your local source for worldwide gas supplies. We provide a wide range of high-quality gas products tailored for hotel operations, from Calor gas through to beer cellar gas, helium canisters and liquified petroleum gas. With a commitment to safety and reliability, we’re here to help you keep your hotel running smoothly and securely. Find out more about our range of bottle gases for your business.
How to Force Carbonate Beer in Kegs – Top Homebrew Methods with CO2
If you’ve ever wondered how to carbonate beer quickly and effectively, this guide will walk you through the best force carbonation methods using a CO2 tank and keg setup. Carbonating beer at home can seem intimidating, but with the right tools and techniques, you can create perfectly carbonated keg beer in no time. Whether you’re a seasoned homebrewer or just starting, this article will provide clear methods to force carbonate your beer like a pro.
Why Force Carbonate Your Beer?
For home brewers, force carbonation is a game-changer. Unlike natural carbonation, which requires additional time and sugar to produce CO2 in bottles, force carbonate a keg allows you to carbonate beer in a keg quickly and with precision. Using a CO2 tank and keg system, you can control the carbonation level and eliminate issues like over-carbonation or under-carbonation. Force carbonation is your best option if you want consistent and delicious beer ready to drink in days instead of weeks.
Article Outline
- What is Force Carbonation and Why Use It?
- Tools Needed for Force Carbonation in a Keg & Make Beer
- Step-by-Step Guide to Force Carbonate Beer with a CO2 Tank
- How Much CO2 Pressure Do You Need to Carbonate Craft Beer?
- Shake the Keg Method: Fast Carbonation Explained
- Set and Forget Method: Precision Carbonation
- Kegging vs. Bottle Conditioning: Which is Better?
- Common Mistakes When Force Carbonating Beer
- How to Serve Beer at the Perfect Carbonation Level
- Maintaining Your Kegging System for Long-Term Use
What is Force Carbonation and Why Use It?
Force carbonation involves injecting CO2 directly into a keg of beer to achieve the desired carbonation level. Unlike natural carbonation, where sugar and yeast produce CO2, force carbonation gives you precise control over the amount of CO2 dissolved in the beer.
Key benefits of force carbon dioxide include:
- Quick results: Beer is ready in 1-2 days.
- No sediment: Unlike bottle-conditioned beer, kegged beer stays clean and sediment-free.
- Consistency: Every glass has the same carbonation level.
Tools Needed for Force Carbonation in a Keg
Before starting, ensure you have the following tools:
- Keg (Corny keg or similar)
- CO2 tank with a regulator
- Gas and beer lines
- CO2 cylinder (filled and ready)
- Refrigerator or kegerator to chill the beer
- PSI chart for desired volumes of CO2
These tools are essential to successfully carbonate your beer. For high-quality gas cylinders, check out CO2 Cylinders from Adams Gas
Step-by-Step Guide to Force Carbonate Beer with a CO2 Tank
Follow these steps for optimal results:
- Chill Your Beer
Cold beer absorbs CO2 faster. Place your keg in the refrigerator and let it cool to around 38°F (3°C). - Connect the CO2 Tank to the Keg
Attach the gas line from the CO2 regulator to the gas inlet on the keg. - Set the PSI
Adjust the regulator to your target pressure based on the desired carbonation level. Use a PSI chart as a guide. - Let the CO2 Dissolve into the Beer
Keep the CO2 connected at a constant pressure for 24-48 hours. - Test the Beer
Disconnect the gas line, pour a sample, and check the carbonation level.
How Much CO2 Pressure Do You Need to Carbonate Beer?
The amount of CO2 pressure you need depends on the temperature of your beer and the desired volumes of CO2. Use this quick reference chart:
| Temperature (°F) | PSI for 2.5 Volumes of CO2 |
|---|---|
| 38°F (3°C) | 12-14 PSI |
| 45°F (7°C) | 16-18 PSI |
By fine-tuning the PSI, you can ensure your beer achieves the perfect carbonation rate.
Shake the Keg Method: Fast Carbonation Explained
The shake the keg with the top of the keg method is ideal when you’re short on time. Shake the keg back and forth. Here’s how to do it:
- Chill the beer to 38°F.
- Set the regulator to 30 PSI.
- Lay the keg on its side and gently roll it back and forth for 10-15 minutes. This agitates the beer, helping CO2 dissolve quickly.
- After 15 minutes, reduce the pressure to serve PSI (around 10-12 PSI).
This method allows CO2 to be absorbed faster into the beer brewing.
Set and Forget Method: Precision Carbonation
The set and forget method is slower but ensures precise and consistent carbonation:
- Chill the beer in the keg.
- Set the CO2 regulator to the desired PSI for the target carbonation level.
- Leave the keg in the refrigerator for 3-7 days.
Kegging vs. Bottle Conditioning: Which is Better?
- Kegging offers faster and cleaner results.
- Bottle conditioning is cheaper but takes longer and creates sediment.
For homebrewers, force carbonation is the most efficient method to carbonate beer at home.
Common Mistakes When Force Carbonating Beer
- Too much pressure: This can lead to over-carbonated beer.
- Warm beer: Always chill the beer before carbonating.
- Leaky gas line: Ensure all connections are airtight.
How to Serve Beer at the Perfect Carbonation Level
Once your beer is carbonated, you need to set the serving pressure:
- Disconnect the CO2 tank and reduce pressure to 10-12 PSI.
- Reconnect the gas line.
- Pour a glass and enjoy the perfectly carbonated beer.
Maintaining Your Kegging System for Long-Term Use
To ensure your kegging system works efficiently:
- Regularly clean gas lines and keg fittings.
- Check the CO2 regulator for leaks.
- Store beer kegs properly at a consistent temperature.
Key Takeaways: Force Carbonation Tips for Homebrewers
- Chill beer before carbonating for faster absorption of CO2.
- Use the set and forget method for precision and consistency.
- For quick results, try the shake the keg method at 30 PSI.
- Always use a CO2 tank with a reliable regulator to control pressure.
- Monitor the level of carbonation to avoid over-carbonating.
For more insights on beer gas cylinders and CO2 solutions, visit Adams Gas . Whether you’re kegging beer or setting up your home bar, Adams Gas offers quality CO2 cylinders for all your needs.
Emergency Procedures for Gas Cylinder Incidents
Gas cylinders play a vital role across many industries, from welding workshops to catering venues, but their importance comes with risks. Knowing how to handle emergencies involving gas cylinders can make all the difference in protecting your staff, customers, and operations. With this guide, we’ll explore how to recognise potential hazards, prepare for incidents, and take the right steps to reduce risks.
What Temperature Does a Gas Cylinder Burst?
High temperatures can be a silent threat to gas cylinders. While most are engineered to handle substantial internal pressures, exposure to extreme heat—such as temperatures above 65°C—can lead to dangerous pressure build-up and potentially cause the cylinder to rupture.
For instance, in a welding shop, heat sources like open flames or machinery can inadvertently expose cylinders to unsafe conditions.
Catering venues, on the other hand, may unintentionally place CO2 cylinders near ovens or heating systems, increasing their risk. The solution lies in proper storage: cool, ventilated spaces away from direct sunlight or heat sources.
Which is More Dangerous Oxygen or Acetylene?
The answer depends on the context. Acetylene is highly flammable, making it particularly sensitive to mishandling. Even a small spark can trigger a serious fire if acetylene is leaking or stored incorrectly. Oxygen, though not flammable on its own, intensifies fires and allows combustion to spread much faster.
For anyone using these gases together—such as oxyfuel for welders—it’s essential to keep them separate, with acetylene stored away from any potential ignition sources. Staff training can further reduce risks, ensuring everyone knows how to handle gases responsibly.
Reacting to an Emergency
When a gas cylinder emergency occurs, quick action is crucial. Here’s a practical approach to follow:
1. Identify the Problem: Whether it’s a leak or a fire, assess the situation carefully. Hissing sounds or frost around the valve can indicate a gas leak, while flames require immediate evacuation.
2. Evacuate Safely: Move everyone to a designated assembly point, away from the danger zone.
3. Close the Valve (If Safe): If it’s safe to approach, shutting off the cylinder can help stop the flow of gas and contain the risk.
4. Ventilate the Space: If there’s a leak, ensure windows and doors are open to disperse the gas, preventing dangerous build-ups.
5. Call Emergency Services: Provide clear details about the type of gas involved and the size of the cylinder to aid responders.
These steps should be part of a comprehensive emergency plan, tailored to the needs of your business.
Preventing Problems Before They Arise
Prevention isn’t just a precaution—it’s a mindset that keeps workplaces running smoothly and safely. Gas cylinders must be treated with care and attention, starting with proper storage. Position cylinders upright in a stable, secure area that’s well-ventilated and far from potential fire hazards. Scheduling regular inspections will identify small signs like surface corrosion or slightly worn valves that might not seem urgent at the time but can develop into serious problems if ignored. Prevention starts with noticing these details and acting before they escalate.
Training staff is just as crucial. An employee who knows how to safely move a cylinder or recognise the early signs of a gas leak is invaluable. Training isn’t a one-off task—it’s an ongoing effort to build a team that feels confident and prepared.
Building a Workplace That Puts Safety First
Creating a work culture where everyone understands their role in keeping the environment secure means taking proactive steps, like introducing storage systems with SOP’s (standard operating procedures) that make compliance easy. Encouraging staff to speak up when something seems off can make all the difference. A well-trained team that know their gas safety sheets won’t hesitate to act if they spot something out of place helping reduce risks and ensures a safer workplace for everyone.
A Thoughtful Approach to Safety
Safety around gas cylinders isn’t just about ticking boxes. It’s about protecting people and the business you’ve worked hard to build. Whether it’s keeping up with inspections, transporting gas cylinders correctly, or ensuring your team knows what to do in an emergency, small decisions can have a big impact.
We work with businesses like yours to ensure you’re equipped not only with reliable products but also with the knowledge to use them safely. If you’re ready to review your current practices or need advice on where to start get in touch today, we’re here to help.
Understanding Gas Cylinder Materials: What Business Owners Need to Know
Selecting gas cylinders for your business is not just about choosing the right gas—it’s also useful to know about the cylinder materials. This knowledge can help with understanding safety, durability, and overall cost-effectiveness for your business. Whether you’re in welding, hospitality, or event planning, knowing what your cylinders are made of can help you make better buying decisions and ensure the smooth running of your operations.
Why Cylinder Material Matters
Gas cylinders might look like simple containers, but their construction is critical to their performance. The materials used affect not only the lifespan of the cylinder but also its ability to withstand pressure and environmental conditions. For example, a cylinder used for TIG welding will have different material needs compared to helium canisters used for inflating balloons at an event.
Understanding the gas canister material can help you avoid costly replacements and ensure you’re using the safest option and know how it reacts in different environments for your business needs. Let’s explore the most common materials used and why they matter.
Steel: The Industry Standard for Strength and Durability
Steel, the industry standard for gas cylinders, is one of the most widely used materials. Its durability, strength, and ability to withstand high pressures make it a reliable choice for any industry, providing you with the reassurance of its robustness.
Types of Steel Used
- Carbon Steel: This is a cost-effective option known for its strength. It’s often used in applications where cylinders are stored in stable conditions, like welding workshops.
- Stainless Steel: This is the go-to choice for places where corrosion is a concern, such as humid or outdoor settings. Stainless steel cylinders are particularly beneficial when storing reactive gases, as they offer excellent protection against rust.
Why Choose Steel for Gas Cylinders?
Steel cylinders are known for their robustness, which means they can handle heavy-duty use without any impact on safety. If your business requires high-pressure gases, steel is typically the best choice, as it can resist the stress associated with frequent refilling and handling.
Aluminium: Lightweight and Corrosion-Resistant
Aluminium cylinders, popular for their portability and corrosion resistance, can facilitate your operations where frequent movement is a challenge. Their lightweight nature, compared to steel, can significantly ease the process of moving cylinders around.

Key Benefits of Aluminium
- Lightweight: Aluminium cylinders are easier to transport, making them ideal for mobile setups like catering events or temporary construction projects.
- Corrosion Resistance: These cylinders are also less prone to rust, which makes them great for humid environments or when used with gases that might react with other materials.
When to Use Aluminium
If you’re working in industries that require portability, such as event planning or catering, aluminium is an excellent choice. It’s also well-suited for applications where the cylinder might be exposed to moisture, ensuring a longer lifespan with less maintenance.
Understanding High-Pressure vs. Low-Pressure Cylinders
The type of gas you’re using will determine whether you need a high-pressure or low-pressure cylinder, and each has specific material requirements.
High-Pressure Cylinders
- Due to their strength, high-pressure cylinders are typically made from steel and are essential for gases like oxygen, nitrogen, or argon. They are often used in MIG welding or medical settings.
- These cylinders need to withstand intense pressures, making material strength a priority.
Low-Pressure Cylinders
- These are usually used for gases like CO₂, which are stored at lower pressures. The focus here is on materials that prevent leaks and corrosion over time.
- Aluminium is often preferred for low-pressure applications because it’s easier to handle and offers good corrosion resistance.
Safety Features Related to Material Choice

Ensuring that your cylinders are made from the right materials isn’t just about efficiency; it’s about safety, too. Using the wrong type of cylinder for a particular gas or environment can lead to failures, leaks, or worse. Here are a couple of safety aspects to keep in mind:
Corrosion Resistance
- Corrosion can weaken a cylinder’s structure over time, leading to leaks—cylinders made of stainless steel or aluminium offer better resistance, reducing the risk of accidents.
Durability and Heat Resistance
- Certain gases require cylinders that can withstand high temperatures. For example, gases used in welding applications can generate heat, so opting for a heat-resistant material like steel can prevent accidents.
Maintenance Tips to Extend Cylinder Lifespan
Proper maintenance is key to getting the most out of your gas cylinders, regardless of the material. Regularly inspecting your cylinders for signs of wear, such as rust or dents, can prevent costly replacements and ensure safety. Steel cylinders are especially important to be stored in a dry, well-ventilated area to prevent corrosion. Meanwhile, aluminium cylinders should be checked for surface damage since they are more prone to scratches, which can weaken their structural integrity over time. By maintaining a consistent inspection schedule, you can extend the lifespan of your cylinders, keeping them in top condition and reducing downtime for your business.
Making Informed Choices for Your Business
When choosing gas cylinders, it’s crucial to consider not only the gas you’re using but also the conditions in which the cylinders will be stored and used. Investing in quality cylinders made from the right materials can save you from headaches down the line, ensuring both safety and longevity.
If you’re in the market for gas cylinders, it’s worth taking the time to understand the different materials available. This knowledge can help you select the best option for your business, whether that’s the steel for heavy-duty applications or aluminium for something more portable.
By choosing high-quality cylinders, you’ll protect your equipment and maintain the safety of your staff and customers.